VR Controllers
In this section we will describe the input map for both OculusVR and HTC Vive PRO controllers.
OculusVR
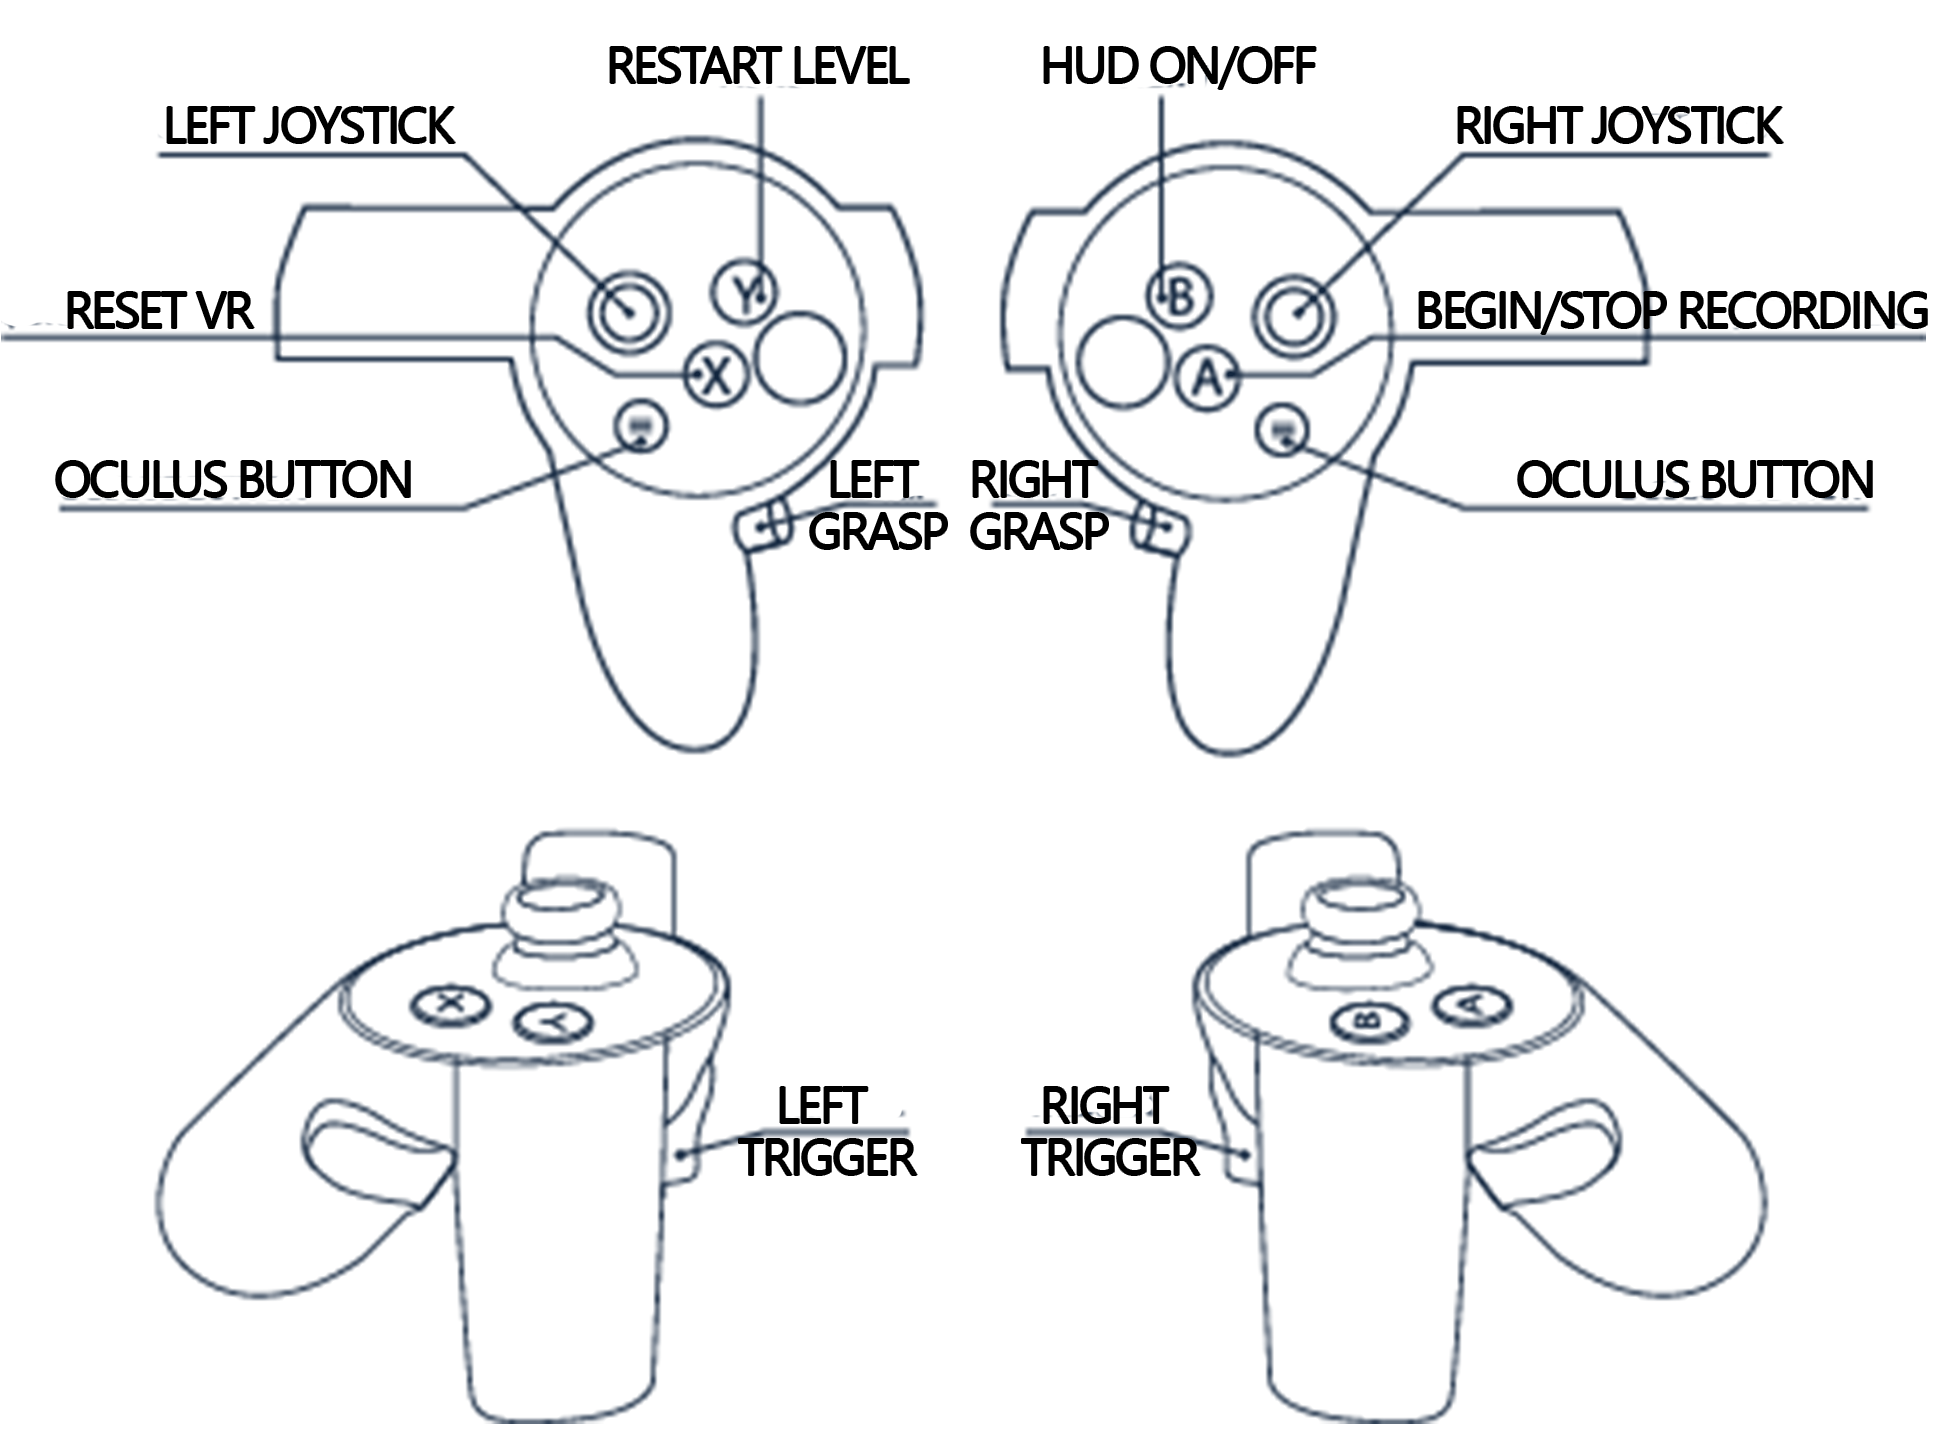
In the following figure (Figure 2) we can see a representation of Oculus controllers with the functions assigned to each of the buttons.

Figure 2. Oculus controllers representation with the correspondence between the robot actions and cotroller buttons.
Using:
- Left and Right Joysticks:
- to move and orient the robot in the scene
- (by first pressing the left joystick) user will be able to position the first person camera according to its height. Use right joystick to move on Z axis and left joystick for movement on X and Y axes [1].
- Left and Right Grasp: grab an object with the left or right hand correspondly.
- Y button: restart the level placing all the objects to its initial position. First person camera configuration is mantained.
- X button: reset VR changing first person camera to its default position and configuration
- B button: turn ON/OFF HUD used for debugging purposes. It enables a mirror to see better robot head position while configuring first person camera
- A button: begin/stop recording process which will dump all the scene information to a .txt file. This file will be used for the playback process.
- Unused buttons: oculus button and left and right triggers.